How to Import OpenAI (ChatGPT) Data into Notion Databases
Want to harness the power of OpenAI's GPT models directly in your Notion workspace? This tutorial shows you how to connect OpenAI APIs (ChatGPT) to your Notion databases without any coding required.
Why connect OpenAI to Notion?
OpenAI data import allows you to send prompts to OpenAI's API and automatically save the AI-generated responses to your Notion databases. This means that you can automate:
- content generation
- data analysis
- document summarization
- image generation
...and more, all from the comfort of your Notion database.
Step 1: Get an OpenAI API key
First, you'll need an OpenAI API key to connect with their services:
- Go to OpenAI's platform
- Sign up or log into your account
- Go to your OpenAI dashboard
- Click API Keys in the left sidebar
- Click Create new secret key
- Copy and save your API key (it starts with
sk-)
Note: OpenAI charges based on usage (tokens processed), so try out with small tests to understand costs.
Step 2: Set up your Notion database
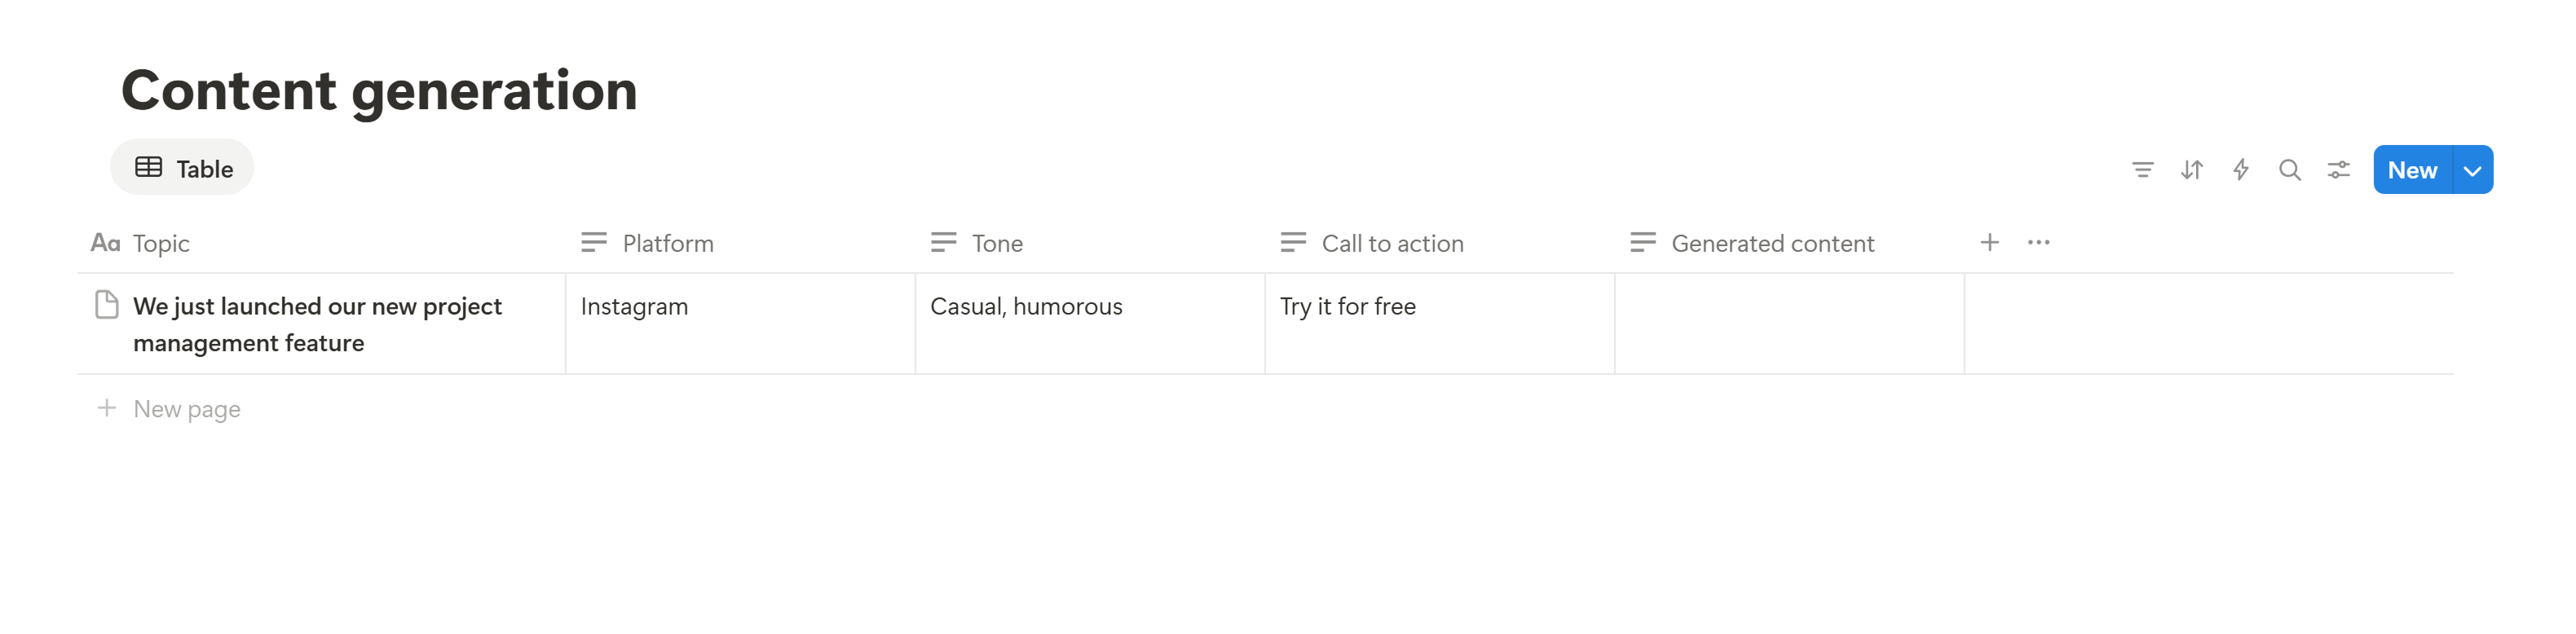
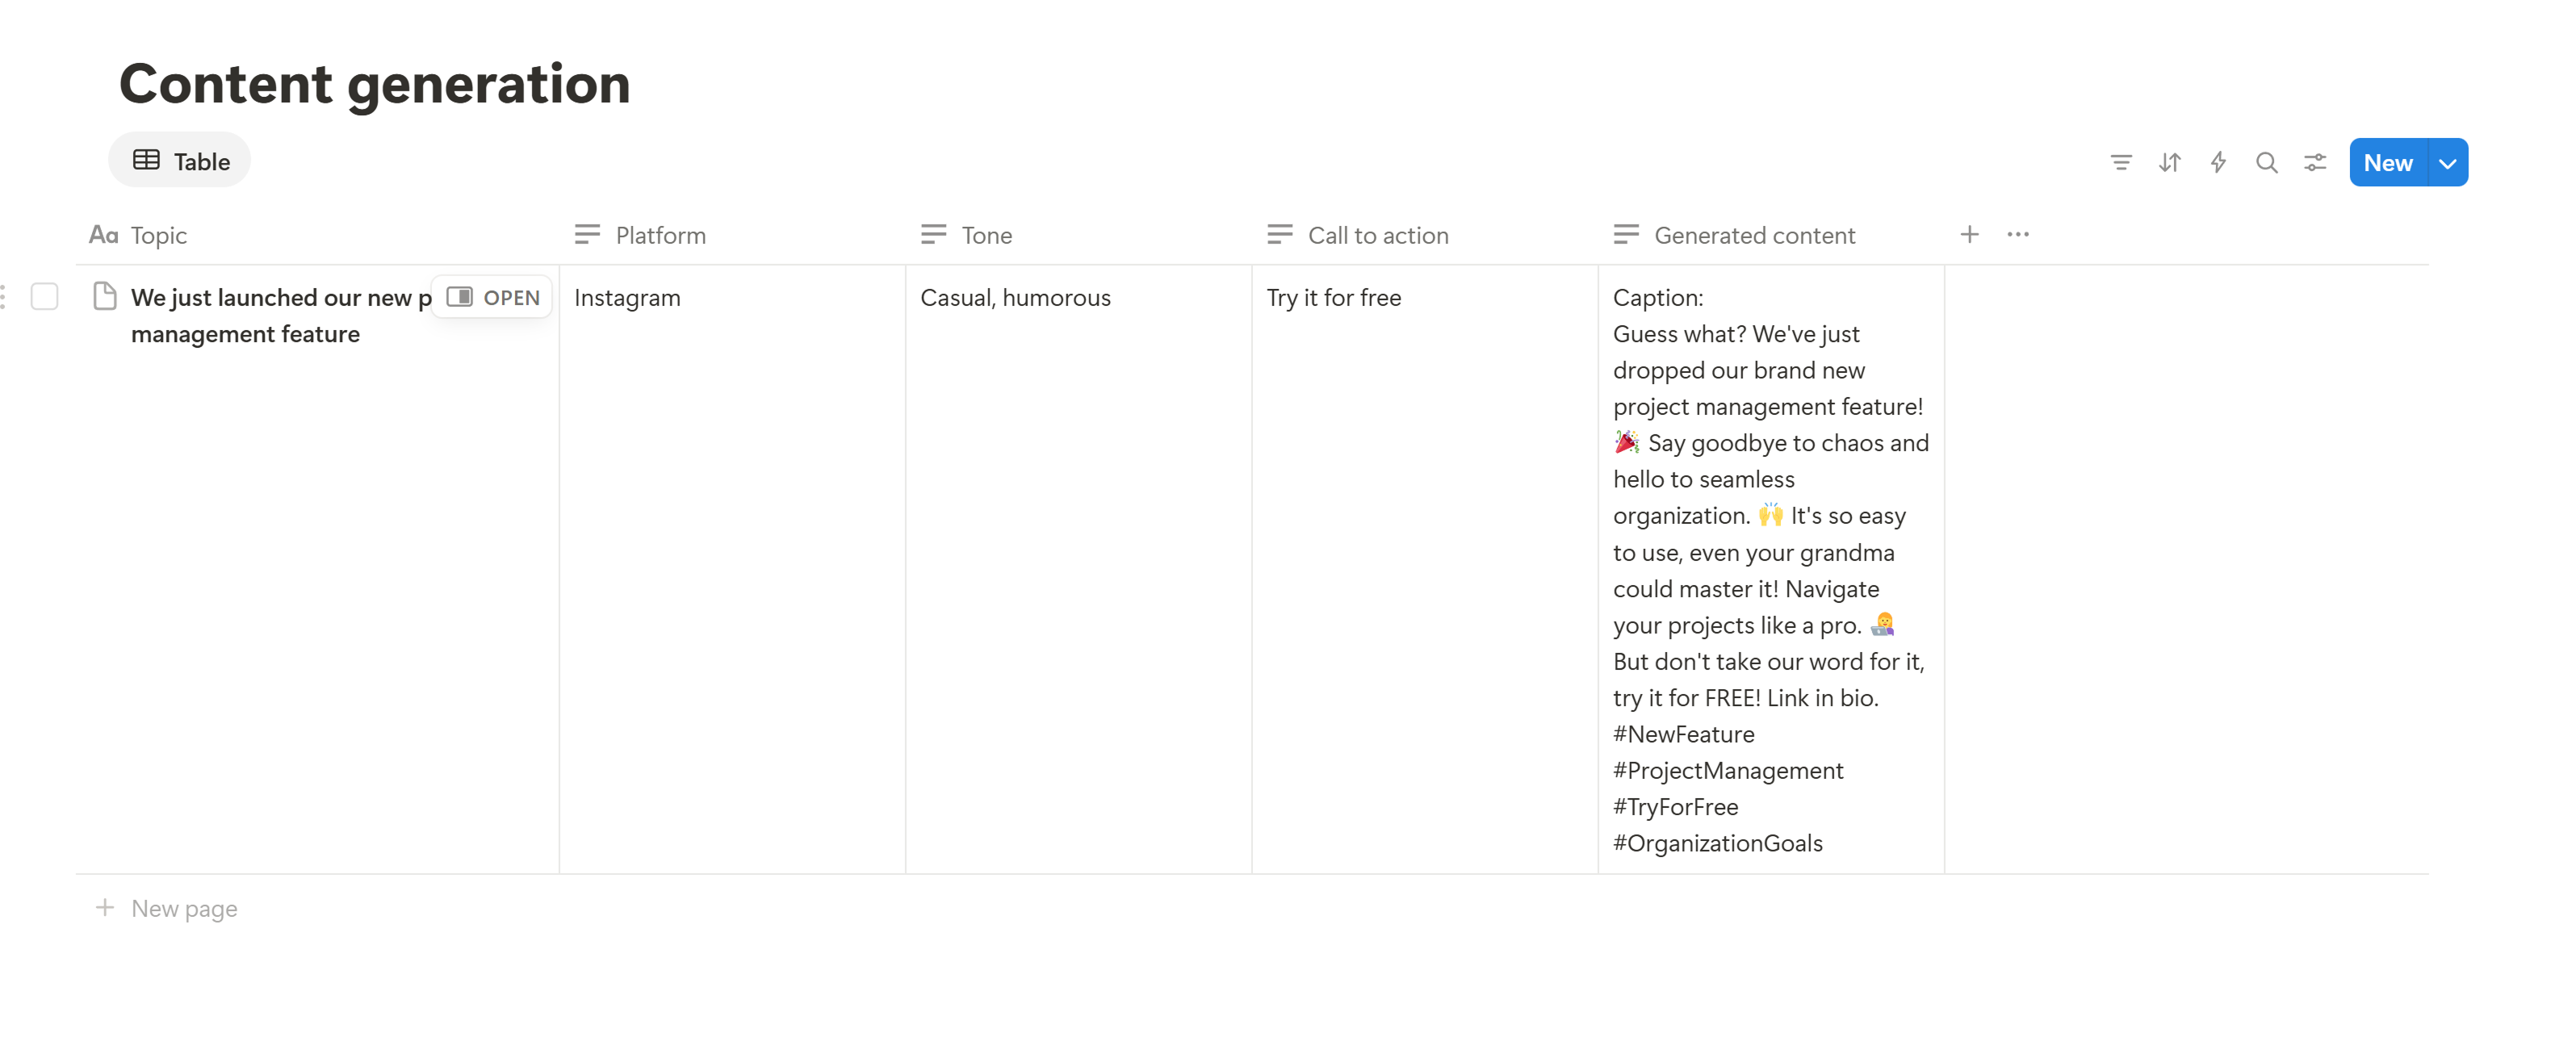
Now let's create a Notion database that will work with OpenAI. We'll use social media content generation as our example. Create these database properties and sample data in your Notion database:
- Topic: "We just launched our new project management feature"
- Platform: Instagram
- Tone: Humorous
- Call to action: "Try it free"
- Generated content: (This will be filled automatically by OpenAI)
Step 3: Connect your Notion workspace
Now we'll connect Otera to your Notion workspace:
- Log into your Otera dashboard
- Click Create Request
- Select Connect to Notion
- Authorize Otera to access your Notion workspace
- Choose the database where you want to generate content
- Click Next
Need help with this step? Check out our detailed Notion connection guide.
Step 4: Configure the OpenAI API request
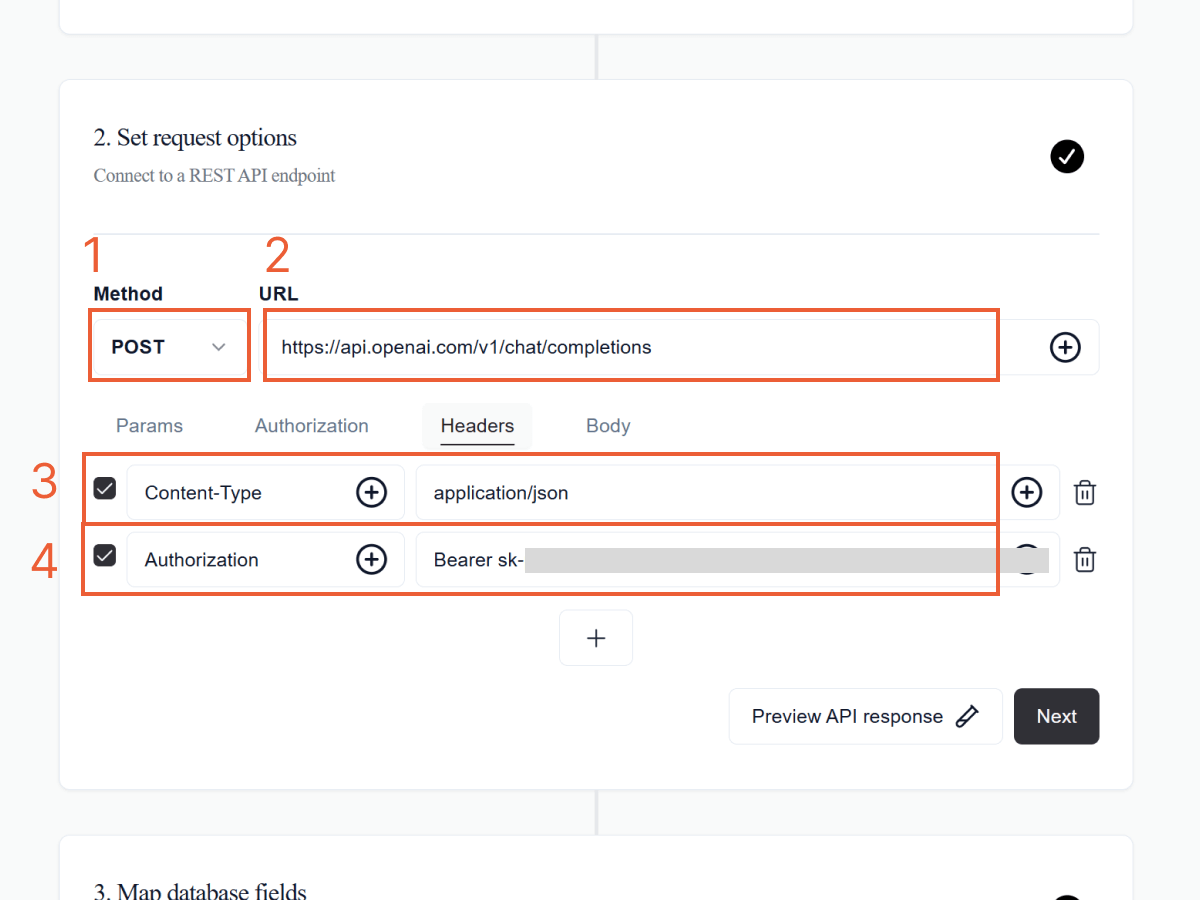
Click Set request options to configure the request:
- Update the Method to
POST - Update the URL to
https://api.openai.com/v1/chat/completions - Add a header:
Content-Type: application/json - Add another header:
Authorization: Bearer YOUR_OPENAI_API_KEY(replaceYOUR_OPENAI_API_KEYwith your actual OpenAI API key from Step 1)
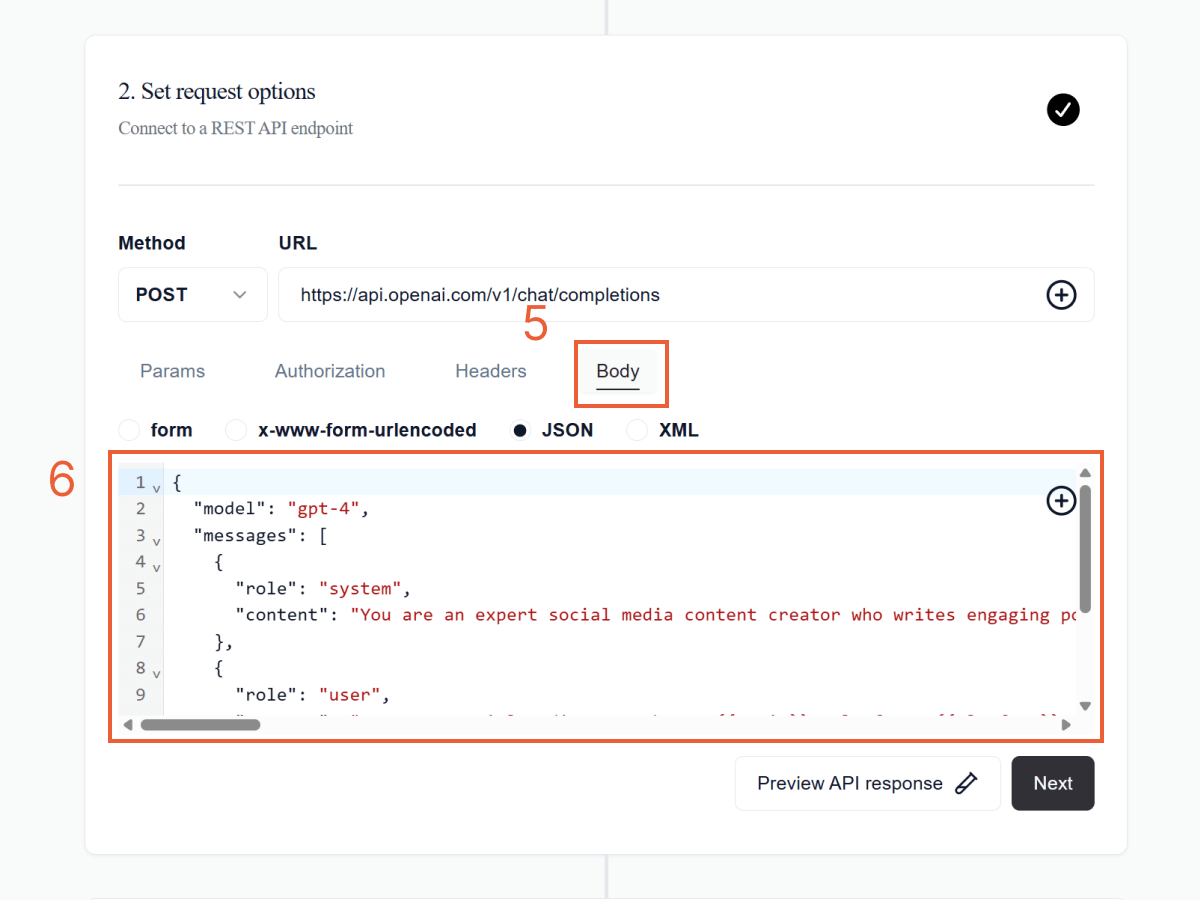
- Click Body
- Paste this JSON to send a prompt to OpenAI
{
  "model": "gpt-4",
  "messages": [
    {
      "role": "system",
      "content": "You are an expert social media content creator who writes engaging posts optimized for different platforms. Create compelling social media content that drives engagement and achieves business goals. Follow platform-specific best practices for length, formatting, and engagement tactics.\n\nFor LinkedIn: Professional tone, industry insights, thought leadership, 1-3 paragraphs\nFor Twitter: Concise, engaging, under 280 characters, use relevant hashtags\nFor Instagram: Visual storytelling, authentic voice, engaging captions\n\nAlways include relevant hashtags and ensure content fits within platform character limits. Focus on value, engagement, and clear calls-to-action."
    },
    {
      "role": "user",
      "content": "Create a social media post about: {{Topic}}. Platform: {{Platform}}. Use a {{Tone}} tone. Include this call-to-action: {{Call to action}}. Make it engaging, platform-appropriate, and include relevant hashtags. Keep within character limits for the specified platform."
    }
  ],
  "max_tokens": 500,
  "temperature": 0.8
}
- Click Next
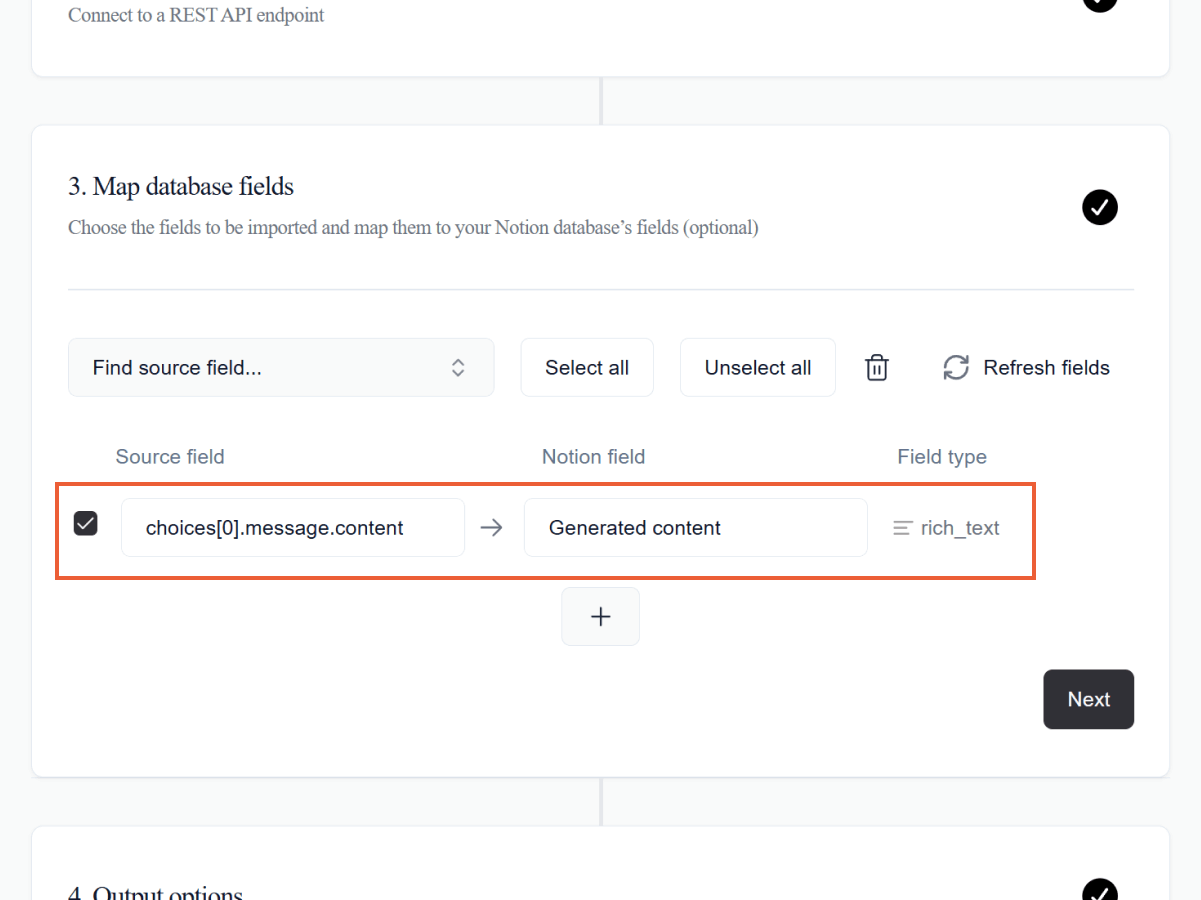
Step 5: Map database fields
Now we need to tell Otera where to save OpenAI's repsonse.
- Delete all automatically generated fields
- Add
choices[0].message.contentas a source field, andGenerated contentas its destination field - Click Next
Step 6: Set output options
Since this request should be unique for each row, and should overwrite the empty cell, here are the output options we need:
- Request type > run for each row
- Output mode > overwrite
- Click Next
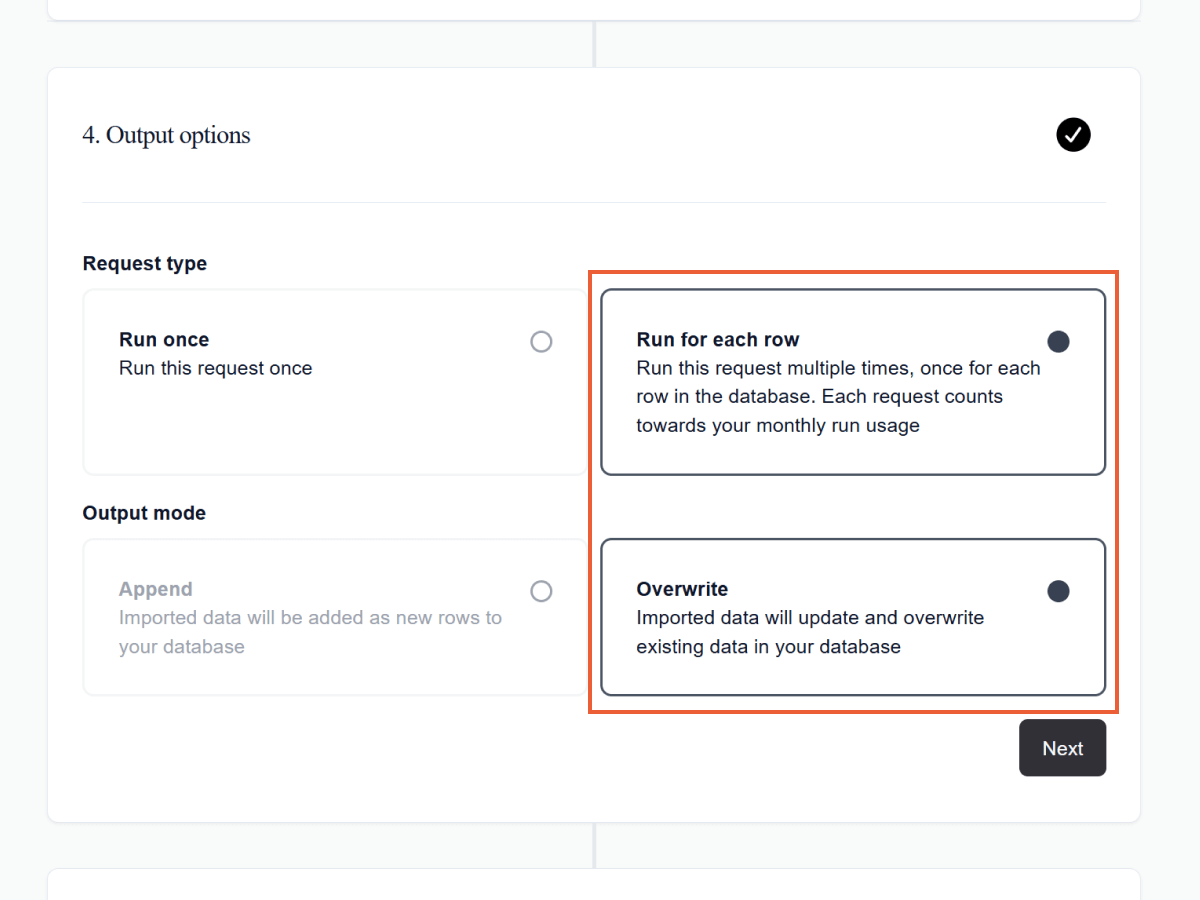
This ensures each content topic gets its own social media post without creating duplicate entries.
Step 6: Run the request
- Click Run request.
- Wait for the request to run.
- Check your Notion database. Your OpenAI data should now be imported.
What's next?
You now have a powerful OpenAI-to-Notion integration! Here are a few other use cases you could try out:
- Email subject lines: Generate A/B test variations for email campaigns
- Product descriptions: Create compelling copy from feature lists
- Ad copy variations: Create multiple versions for different audiences and platforms
With this foundation, you can automate any workflow that involves AI processing and structured data storage.